Wednesday, 31 January 2024

Sigma

There's a lot going on. Actually, there's one giant thing going on. I had a blood test last week, and on Monday morning, I learned that I have type-2 diabetes. I've not just developed it, I've probably had it for years and its in a very bad state. It wasn't a shock. I actually visited the doctor with worries that I had it, but as I'm not overweight, he didn't think it was likely. We'll see how this goes. I'm going to miss eating mountains of bread.

On to Blender

Sigma Base

There's another update to the Sanctus Library. It's got some great new additions, but their use is more complicated. For example, there's a weld line that you can apply, but as it's geo-nodes-based, it takes some configuration to look right. Sigma base was a bit of a play with Sanctus and Random Flow, which also received some new features/improvements.

A different backdrop for the base model - not used, yet

Monday, 29 January 2024

The big D

 Various things...


work in progress for some fields

Moody old olive tree

Enemy base - celebrating Random Flow and Sanctus Library


Sunday, 28 January 2024

Coastal Defender


I didn't have a suitable human to place in the scene, so my eldest son agreed to cameo. This was thrown together quickly. There are a bunch of elements that are broken if you look too long -- bird scale, for instance.


From earlier:


I'm still not sure If I'll finish the Boulton. However, this test of the spin arms gives me some enthusiasm.


Thursday, 25 January 2024

Coastal Defender and Blender School Next


A couple of days ago, I created a beach environment scene.

Rocky coast


I liked it, but it needed a subject. A titan war machine standing above the shoreline, its legs clustered with barnacles and seaweed or grass, immediately came to mind. Seemed like a nice hard surface modelling project to practice my new techniques.

First stab - rejected

This first stab was soon rejected. I liked some of the elements but it was way too detailed too soon. I needed to apply a blocking-out stage. I'd done some very rudimentary sketches, mostly to settle on the type of legs and their arrangement.

Blocking-out 1
I was happy with a very quick block arrangement. It made me think of a spider or scorpion, which seemed apt for a defensive vehicle/mech.

I made the basic legs articulated.
The articulation made me more confident about the general layout, although it proved to be a mistake in that I never really liked the leg design. 

Secondary details

I started to refine components and add major detail elements. At some point, I fell into my old trap of going into too much detail, although it doesn't feel like such a problem when you are (mostly) happy with the general design.

In the weeds

Yes, I'm definitely starting into the fine details too soon. But I survived...except I really don't think the legs match. They are just a bit too crude.

New legs!

Cricket, anyone?
Just a few areas to clean up or refine.

Blender School

I stopped my Hard Ops lessons. I was eager to make something after such an intensive course. I now realise that I would have benefited from Hard Ops on this project. I'll consider buying into a course but for now I think I'll see how far YouTube can take me.

Tuesday, 23 January 2024

Various threads

 The modelling of the Boulton continues. I had a problem that I'd encountered once before where the rendered viewport showed something different from an actual render. In this latest case, it was a set of Boolean windows that were okay in the viewport but not visible when rendered. I tried various things and got some improvement by fiddling with the verts. At first, I thought it was just a weird, normal issue, but it was something a bit stranger. Almost certainly where geometry was bad, but not visibly bad.

Still using Booleans like a loon.

A missing window pane in the right-most bank of windows.

Undergrowth Asset pack - TrueVFX


I'm a total fan of TrueVFX's Blender tools, so even though I'm not much into close-up nature renders, I immediately bagged their new Undergrowth asset pack. I bagged it so quickly I missed an available discount had I only read to the end of their announcement.

Mushrooms and the stone. Suzanne, you already know.

Every asset, a hero!

The quality of the assets is superb. I had to remove Bagapie grass because it looked faked next to these amazing fungi.

Trees

This morning, I had a blood test to check on my health. Because I was a very brave boy, I bought myself the Botaniq library -- it's great! There are better, more idiosyncratic tree assets, but these are nicely parametric. You can randomise branching, and you can alter leaf colour. it's also pretty large and can work through their new Engon Free blender browser.


Monday, 22 January 2024

Friday, 19 January 2024

The first rule of blocking out club is...

 Don't detail. You are blocking out!!

I broke the rule.


This is maybe the fifth attempt at the Andrew Boulton-class Light Cruiser from Charles E. Gannon's excellent Terran Federation novels. 

Andrew Boulton-class Light Cruiser

Oh oh! Too much fine detail on the command module

It's a hard habit to stop, it seems. I'll go back to the big elements. The colour shifts are not surface changes. They're lots of Boolean slices. It might be a silly way to divide a hull, but it does sidestep mesh difficulties. We'll see what happens when we try to attach decals.

Obligatory landscapes


Wednesday, 17 January 2024

Blender school - Done


missing modelling elements. I completed the texture steps anyway.

I've got what I needed, so I'm not going to guild this Lilly. Actually, I'm not going to fix some missing elements that seem to have disappeared. Specifically, a layer of finer detail Boolean elements.

The course was great. I look at projects differently. I plan better. I have a better appreciation for blocking out and holding back on details. That's something that I got really bad at. Far too many times, I've flown into a design roadblock because I went too far in one small area.

I've actually not completed the post-production lessons because I don't have Photoshop, and I don't feel it's a priority. Post is where you can fix the mistakes you made in modelling -- well, I want to learn to avoid that.

What next?

I still feel like I should finally learn how to use Hardops. Strangely enough, the final course video was a bit of an ad for Hard Ops. Ryuu makes a great case for shifting to Hardops as it's clearly a hard surface modelling accelerator.

In terms of projects, I'm thinking of another stab at a starship from Charles E. Gannon's Tales of the Terran Federation, the Caine Riordan stories.

Tuesday, 16 January 2024

Blender School - almost finished the modelling


The building phase is very nearly complete. I actually stopped following Ryuu's guidance, not because it wasn't great. The real learning of this course is about applying the lessons for yourself. I made a few alterations that are less clean, especially on the lower leg Booleans. In most of the other cases, I think I've kept things looking okay.


Monday, 15 January 2024

Blender School - Mech continued

 The next part of the Blender course covered the rest of the mech build.

Blocking out the legs

Cuts and bevels to make the legs look like they work.

Halfway through the middle detail lesson

The lessons covered previous knowledge and expanded on bevel troubleshooting, which lost me a bit. Lots of deep configurations that I'd not seen before. Either I'll go through those bits again, or more likely, I'll read into the official Blender docs or dedicated bevel tutorials.

Some other stuff

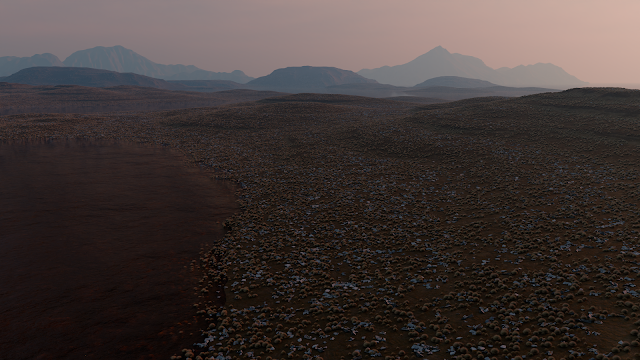
Landscapes. Of course!

Two terrains for extra depth

Big rock scatter

Same as above, without the rocks

Beachy


Saturday, 13 January 2024

Blender School -- The Mech!

 I've reached the end of the Blender training course. All that's left is the practical exercise to put to use all the new knowledge in order to make a really cool mech. In truth, I didn't get a huge amount of new knowledge, but it's more than enough to justify the time and the money. The course was clearly intended for beginners, and for them, this would be of massive value.

For me, the biggest benefit has been covering core principles and workflows that I'd learned in my first weeks, but then lost when I stopped using Blender for a while - sometimes a long while. Coming back, I'd overvalue my working knowledge and just push through modelling challenges without doing a knowledge refresh. This happened a lot over the ten years since I began my Blender journey.

I'd ended up with gaps in my knowledge for wildly important things. This has been a good refresher. It's taken me through the mesh cleanup steps and reminded me of the underlying concepts that drive that work.

Many years ago I bought HardOps. It looked amazing, but I didn't invest enough in learning its tools, and I was never comfortable with the necessary cleanup phase. Later, I bought Fluent, which was much simpler to use, but again, I'd get into trouble and not understand how to fix issues that are inevitable when you constantly throw around Booleans and Bevels.

I've decided that I will buy the Blender Bros Introductory course for Hard Ops and either transition to their HardOps workflow or at least have it available when it makes sense to use.

The Mech: Lesson 1 (Block out the body)

The same basic steps as the previous course: Creating and cutting a big structure.

The Mech: Lesson 2 (Continue to block out the body)

Booleans, bevels, clever mirroring and cutter management


Next lesson: The legs!

Friday, 12 January 2024

Blender School - Design Rules

 I've reached a section of the Hard Surface Modelling course that deals with fundamentals. It has nothing to do with Blender itself, but it is critical if you want to use it as a design tool for creating cool objects.

Balance

How a design combines different elements harmoniously. Symmetry and asymmetry are used to give a design a sense of order and stability, but balance need not be based on perfect symmetry. Elements can be balanced in different ways. For example, put more mass lower down, and your design will look more stable.

Other balancing elements:

  • Framing
  • Avoiding attention pullers or a lack of focus
  • "White Void", the use of negative space, can transform the presentation of a design. A design can breathe and live when provided with a space. Give the viewer a place to rest their eyes.

70/30 Rule

Within a design, we seek to create compositions that place 70% of its space towards visually simple space, leaving 30% for the fine details. A composition that contains more details can be visually overloading.


Emphasis

This is the use of visual anchors to pull a viewer's eye towards a design element. Chain together visual elements that will draw the viewer's eyes across the design in a satisfying manner.

Level of detail: Primary, secondary, and tertiary details.

There are lots of different elements that can be used for emphasis, colour, sharpness, position, texture, and more. Each can be used to form a star constellation of visual pulls.

Just remember, use carefully - using too much emphasis is the same as losing emphasis.

Variety

Find the balance! Too much variety can be distracting. The right amount of variety adds interest and appeal, but if you go too far, you will not be effective.

Avoid "sandwiching" -- repetition of elements that build monotony. It happens when you try to fill space without doing the heavy lifting of good design.

Movement

Strategic placement of visual elements or leading lines will move the viewer across the design.

Movement begins "top-left" and follows visual anchors across a composition. The longer you capture the attention of a viewer, the better.

Direction can be used for story building -- taking the eyes on a journey. 

Proportion

Size, scale and proportion. Using reference elements to set the correct space. The ratio of elements can be important in setting proper proportions.

Unity

A unity can be created through the use of consistent patterns and themes. The highest level of echoing. Don't overuse kitbashing, as they are likely to create conflicting patterns that break unity.

Blender School - Topology

 
Today's lesson: Topology.

This is important. Building in Blender can become very frustrating if your model contains bad topology. My models often do, so I'll be taking notes...


1. Topology vs Geometry

  • The topology of a mesh is concerned with triangles and polygons, which include quads and Ngons.
  • The Geometry of a mesh is concerned with vertices and edges.

2. Shading problems

  • You can't make a triangle non-planar, so it will never exhibit shading errors.

  •  If you put a crease in a quad or an Ngon, it will result in shader problems as the shader engine tries to deal with an edge that isn't there. Ngon issues are more obvious as you'll often see multiple triangular elements.

  • In more complex meshes, shading problems happen when there is a break in the flow, which results in the shader producing uneven effects.
3. Common topology problems
  •   Non-manifold geometry, such as internal faces that are hidden in the viewport but become apparent if you go into normals view. A telltale sign of this is if edges refuse to be merged because they are supporting a hidden face.

  • Flipped normals occur when an operation on your geometry pushes some elements inside out, so that the normal points inwards instead of outwards. Quick fix: Select all faces, then Shift +N.

  • Disconnected geometry is also hard to spot in the viewport. Easy fix. Select all vertices, then M to merge.

  • Overlapping geometry is very common, usually as a result of a bevel that goes too far. Again, merge vertices if it happens, or ensure that you clamp the bevel to avoid overlaps.

4. Common shading problems
  • Autosmooth isn't enabled. Easy fix: enable it.
  • Boolean operations on a curved surface. Add more edge loops!
  • Customer Split Normals - If the auto smooth is greyed out, the problem may be caused by Custom Split Normals. You can delete them under the data tab, in the Geometry Data panel. 
  • Bent geometry, as mentioned in shading problems. 


Thursday, 11 January 2024

Blender School continued - Some more lessons

 Today's lessons taught me a bunch of stuff.

Booleans!

Bool Tool menu:

Ctrl+Shift+B

Suddenly, I realised that the default mode for Bool Tool is "Brush", which leaves the cutter in play. Lots of times, I want the operator to be immediately applied... So it's Shift plus the Brush keyboard shortcut. Easy!

Boolean Topology

1. All Boolean operations need two connecting edges. Take note that if these connecting edges are not perpendicular to the Boolean's edge, it will cause problems if you try to add a bevel later.


2. No-manifold geometry

Boolean operations may produce unexpected results if applied to non-manifold geometry. That's a mesh that contains gaps or places where parts of the geometry intersect with itself.

3. Use "Exact" mode for Booleans. If your cutter and target have faces that occupy the same place, you might get Z-fighting, where Blender doesn't know which face to render, giving you a weird "both faces render at the same time" issue.

4. Booleans can create Ngons, which break the flow of your mesh topology -- bad topology! Keep an eye out and deal with it if it becomes a problem for your model.

5. You can apply Booleans to your cutter.

Tuesday, 9 January 2024

Back to Blender school!

 More really basic lessons for things I had forgotten or just forgot to use.


Flying through the basic command lessons. These are all a couple of minutes at most. It's really basic stuff but some of it hadn't stuck, so I didn't use it.

View selected object:  Number Pad Period.
How can I not be using this all the time?!

Repeat last command: Shift+R
I'm sure this is really useful although I feel like I've survived without it...

Visibility

Hide selected object: H
I am using this but not it's inverse:

Hide the inverse of your selection: Shift+H

Local view: /
My new best friend! Remember its a toggle.

Bool Tool

Slice:

1. Select both objects
2. Ctrl+ number pad slash
3. Instead of applying one object as a cutter, both objects are cut out from each other, leaving both objects cut from each other.

I don't know why I lost track of the Bool tool. I didn't use Booleans quite as often as hard surface modellers now do.

Installed Modifer Tools


A simple addon that gives you some global commands for applying to all modifiers, such as applying all modifiers with a single click.


I just hit 25% of the course. Getting there!


Mobile Starport Progress


I'm pretty happy with where I'm at. I had to stop working on it because I could feel my attention to detail was slipping. This would be the point where I'm adding stuff without thinking deeply about what I was doing. I'd add elements, but they wouldn't really be working.

I'm still toying with the idea that I will completely rebuild the track trains/bogeys. We'll see. They could do with being a bit more chunky.


Thursday, 4 January 2024

Blender School: Oh Snap!

Next lessons: Snapping 


I'll be honest: I've hardly ever used the Snap function. I've usually wiggled things into position without a lot of precision. It's time to do things properly.

This is what Blender Bros. Josh taught me about snapping:

1. You can invoke snap by pressing Ctrl while moving an object. The movement will adhere to the current Snap type, increments by default.

2. While increment means that you snap to your scene's grid, the other snap types relate to other objects in a scene. Vertex snaps to the vertex of another object, likewise with a face.

3. If you select Face projection snapping, you need to tick  Align Rotation to Target. That said, I'm not yet sure how you get this to work in the expected manner.

Most of the time, you'll be using vertex snapping because it's quick and precise.


Origins and Cursor


Very important!

Yet another super-useful pie menu from Machin3tools:

Shift + S


The 3D Cursor is an arbitrary point that you can place anywhere in the viewport space. It has X, Y, and Z coordinates. You place it with the mouse. Point to a location and press the Shift+Right mouse button. The cursor is used as a placemark, where you can move an object or an object's origin to it.

The origin is an object's median point; essentially, it's a dot at the object's centre. This is used as a reference point for any kind of translation. You can move the origin for things like pivot operations.

Tip: Shift+S, then Cursor to Origin, will return the 3D cursor to the VP grid's origin if you don't have an active object selected. Useful if you want newly created objects to appear in the centre.

Move to Origin, for example. This will move the cube's origin to the current location of the 3D cursor. This can be helpful if you want an object to be associated with an external point, maybe for pivot operations. Some modifiers and other operations work from an object's origin.


Mobile space port

 I occasionally like to go back into my past projects and create an update. Take an old idea and apply newer skills and higher proficiency. It's that time again. 

Mobile spaceport

2010 Pre-blender (3DS Max 4)

This vehicle wanders along the bottom of deep canyons, looking for ice fissures from where water is collected and converted into starship fuel. It's a monster-tracked vehicle which originally would have supported a whole population. Cool idea, but I gave up on this version as I couldn't figure out how to make it into a township with lots of surface buildings.


Time to try again!

Early days. I've not used tank-style tracks this time. It's four massive bogeys on which two triple-tracked trains are mounted. All this detail will probably get lost when the main hull sits on top of it.                                               


Wednesday, 3 January 2024

New course


The Hard Surface Accelerator, again, from the Blender Bros. They really know their Blender onions, although the course mistakenly applies some bad assumptions -- configuring Blender specifically for Hard Surface modelling. The idea that I'm some young whippersnapper hungry to break into the world of DCC. I think they could improve their game by being 20% less "Bro".

That said, it's so far been good content; it's solid foundational knowledge.

Let me record some basics about the Transform Orientations tool.


Transform Orientations

Crucial tool in the Object Mode. It tells Blender which set of coordinates to use for any transform operation you apply to a selected object.

Global: That grid system which has its own X,Y, and Z axis. The global coordinate system doesn't move.

Local: Your object's own axis. if your object is moved so it's no longer aligned with the Global coordinate system, use this. The coordinate system moves with the selected object.

Normal: This coordinate system is used in edit mode and applies the coordinate system to the normals of selected faces. One use for this is flattening out the faces by selecting them, applying the Normal coordinates, then selecting S and C, and scaling until all the faces are flattened.

You can also use the Normal coordinates to edit a landscape mesh, selecting faces and applying transforms along face normals.

Gimbal: This is a very niche coordinate system, mostly used when operating in the quaternion coordinate system, which handles rotations with an additional axis, without which Eulers get you into trouble. See Quaternion or Euler, understanding rotation. It's complicated, and it's mostly for animators.

View: Aligns the coordinate system to your current view. Moving the selected object along the Z axis is like performing a zoom.

Cursor: Align the coordinate system to your trusty 3D Cursor. Adjust the cursor's orientation from the View tab.

Parent: Previously, you'd need to select parent, snap and orient the 3D cursor to select, select the previous child, and set transform orientation to the 3D cursor. Now, you have the object to set the coordinates to that of the parent object.

More Terrain, always, it seems

Playing with atmosphere and Geo-scatter


The edge of the Christmas storm

 Christmas 2024 is officially upon us. Family members are starting to gather, and presents haven't wrapped themselves. I've figured ...