Tuesday, 27 May 2014

A change of heart about Photoshop plugins


Still learning what keys to press

I'm still learning shortcuts, critical ones too -- Cntl+Up Arrow for going full screen on your current view. I can't believe I battled on without learning that one for so long. I've been reminded of this little tool on Facebook's Blender group:
http://waldobronchart.github.io/ShortcutMapper/#Blender  This too: http://download.blender.org/documentation/BlenderHotkeyReference.pdf


Digital Heavens cosmic pack 3 

I'm not very keen on quick plugin solutions because they can dull my artistic senses - if you use Photoshop then you'll have had that experience of seeing someone's work and immediately recognising the work of a filter, probably because it was applied with little or no tweaking -- it just kills the work for you. I held off buying Cosmic Pack 3 product from Digital Heavens because of this fear - that if I use cosmic pack 3 outputs in my work anyone familiar with the product will very likely recognise that I used it to shortcut the creative journey.

..and that's when I bought it anyway

Well, the lack of time that I have to spend being creative has forced me into a change of mind - I wanted to create some more planet maps but realised that I could spend a week just making a few maps without getting any actual work done. Not to mention that you can use these off-the-shelf tools as a starting point and make sure that you don't finish until the output is refined enough that it doesn't look like other example Cosmic Pack work.

Blender output using Cosmic Pack 3 starfield and planet maps.

I only had time to blindly run through a quick planet creation, there were some quirks that I need to research as I expected prompts for modifying masks and layer qualities, such as scale, however, I am instantly impressed. I'm seeing Cosmic Pack 3 more as an extended palette for space scenery and less like an stamp-on solution for generic space backgrounds.

Sunday, 11 May 2014

Still blending...


Just to be clear, the lack of posts isn't because I stopped working with Blender -- if anything I've become more focused since the last update, spending a  lot of time going back and improving work, tackling stuff that I've previously hated -- specifically UV mapping and texture mapping. 


Suffering for Suffren

I completed my build of the 2300AD star ship IFV Bassompiere - a Suffren-class cruiser and was happy enough with the results that I decided that it was going to get the full texture mapping treatment. That took ages! I restarted the process about three times, but the underlying workflow is steady and pretty easy - thanks to the regular forms that make up the model.


Boxing out the basic form - getting the proportions right. This was about the fourth attempt.

The Suffren has a really simple form. Getting a lot of detail onto those flat surfaces helps break up the form and give the viewer a better sense of scale.

Time to paint it up. Each section had its UV exported then applied as a mesh which gives an interesting 'look' in its own right. I did this stage three times, each time trying to optimize how the meshes unwrapped.

Texture mapping underway. With a good UV setup texture mapping gets a lot easier. I've spent years getting nowhere with mapping because of building out of lots of unconnected meshes. Finally getting somewhere!

Model -almost finished, here. Some glowing lights need to be added. The three Landers attached at the back.

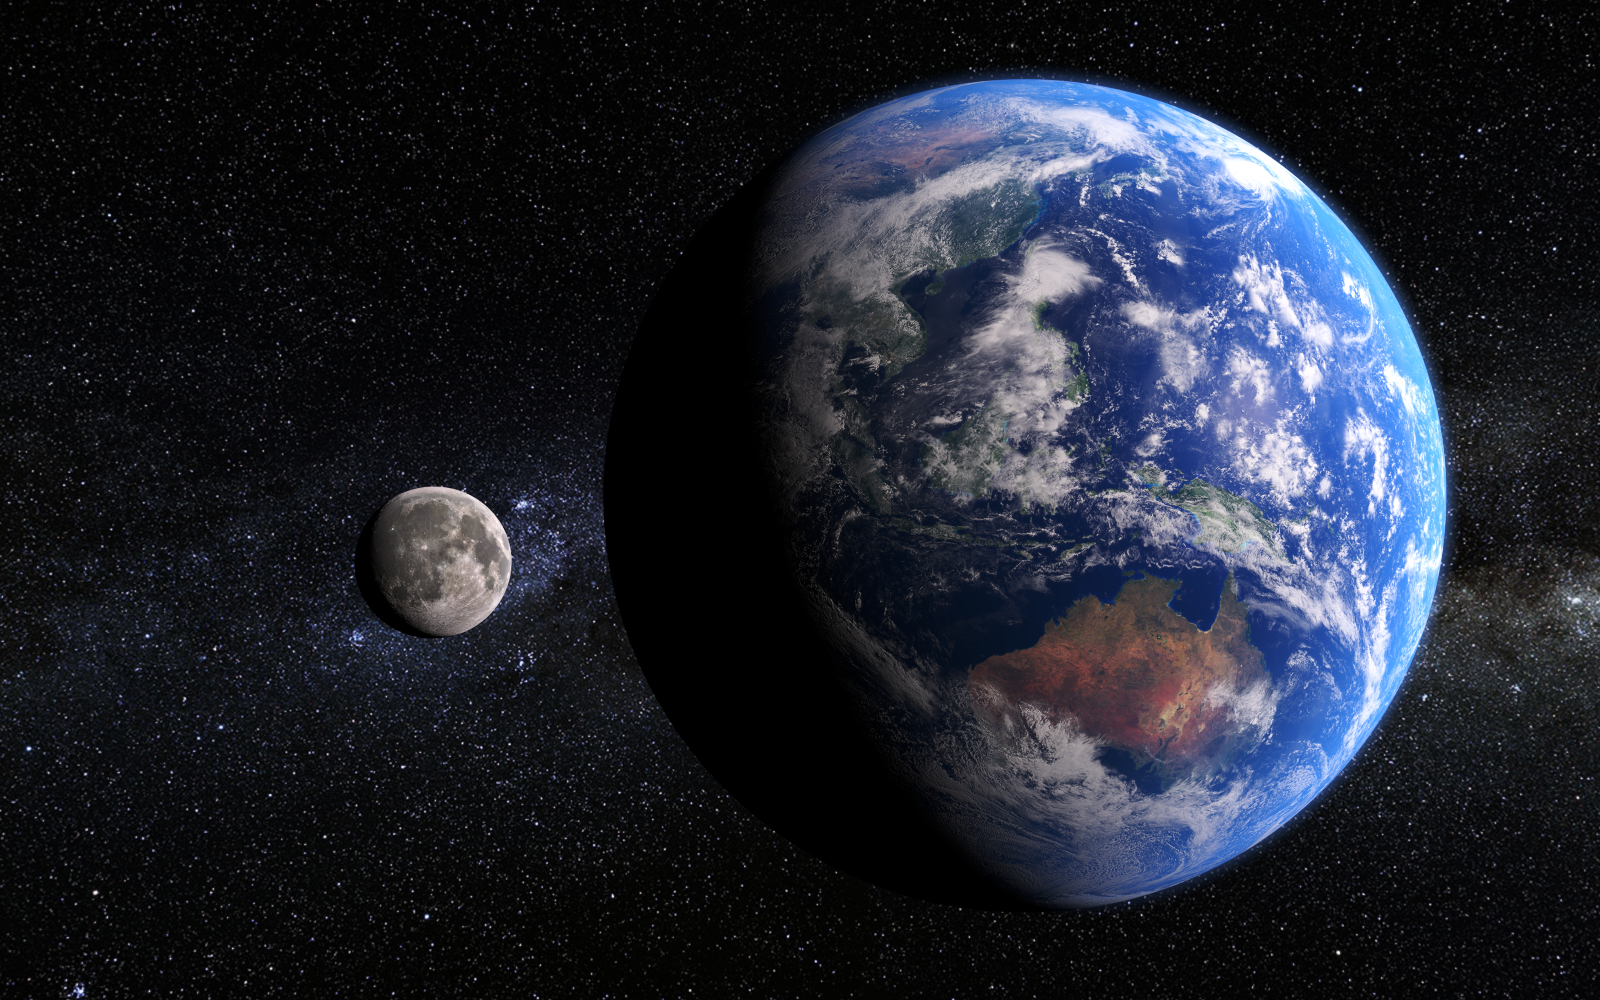
For a brief animation I put together this wrap-around-a-globe background image, based on the Earth scene I downloaded from Blender Swap. This is a sample of a 10,000 by 8,000 render - the biggest I've ever done by a long long shot. Suddenly I realise why all my environmental backgrounds have failed in the past -- my background images were about one tenth of the size required to avoid horrible artefacts from appearing.

Thursday, 13 March 2014

Video


So it struck me that I have never touched anything to do with animation. Quite common with me. Animation is hard and it's only done when you have models worthy of the great effort. I don't often get past texture mapping...

Well I thought I'd lay in some keyframes and see how Blender handles the basics. Not much to see - just a jolly big landscape that I knocked together in 5 minutes using an existing height map.

Wednesday, 26 February 2014

Bucket


Took a quick break from deck plans. I just needed something simple that I could nail in an hour. You got bucket! I did some work on the textures but they didn't work.

Building small objects that you can complete quickly is a great exercise for learning modelling. Even the largest models are an exercise in breaking down objects into sub-parts, then breaking down parts into elements and details. The beauty of a small object is that there's less to go wrong and you're either successful or not in a single sit-in.

Friday, 21 February 2014

Ping!

 It just struck me that I have not posted updates for a while. Stopped using Blender? Not at all. I have some other creative work that I need to concentrate on for a little while.

I'm no longer in a tiz about Cycles. I'll accept that my gaming powerhouse GPU doesn't translate into the best CUDA performer. I'll also accept that big scenes will swamp the GPU and render much more slowly than the CPU. Here was a quick test I did to get my head around the differences in quality / samples and render time.

10 samples - instant

100 samples - 7 seconds
1000 samples - 67 seconds

Messing around with materials

I have not had much time to model new stuff -- I knocked this cargo container out in a very short time -- which is why it's not scoring much for accuracy. Does the job though!

Low-ish poly shipping container

Tuesday, 11 February 2014

Name to my pain


So I did some digging, and some more horrifically slow GPU-powered CUDA rendering. It seems that SLI isn't very good for Blender. However, it's not straight forward as this benchmark scene does great work with multiple GPUs.

PC: Ark GTX690 2GPU

PC:Ark GTX690 1GPU

PC: Ark GTX690 CPU

However...

GPU Rendertime:15m41s03

CPU Rendertime: 48s

The difference here is stupendous. The top flight graphics card (or at least it was 12 months ago) lags so far behind the standard CPU render that it becomes a rather sad joke... Scene complexity maybe? The top benchmark scene is very light on polygons.

I learned a lot from http://www.systemagnostic.com/ which covers the issue of Cycles rendering with CUDA in a lot of detail.

Sunday, 9 February 2014

Quick practice box-modelling

Another sketching session - 30 mins or there abouts. This, the Hurricane IV Close Support Aircraft is the result. It's a riff on an earlier 15 minute sketch.


This was another long render. It's weird because suddenly rendering seems slower, or are my scenes getting more complex or featuring assets or using settings that cause cycles to slow? Questions to ponder...

Saturday, 8 February 2014

Earth Cycles


Delighted by the quality of the output but this 800 by 800px still took an hour and forty eight minutes to created. Awesome as it is, that's not a render time I'm used to these days. It's not like I'm running a slow system.


And then...
I made some tucks and tweaks then set a full size rendering going while we took Noah out for some exercise. Another great result but this beast took five hours to render.

Scene available from Blend Swap, created by Adriano

Earth Original


The downloaded blend file from the tutorial generates a kick-ass Earth. However, the default render took an hour and a half to complete -- and at the end I was left with a blank screen because the composite setup must be missing some file paths. Isn't there a warning about missing files in the pipeline. Tut!

I'll have a closer look later.

Friday, 7 February 2014

Earth


There's something rotten in the state of Denmark. There's actually someone a bit off everywhere... I'm a bit disappointed by my first bash at a planet Earth model, using Blender's Cycles. For starters, this is the first scene that fails to render using the GPU compute option -- too much texture data! They are pretty big maps, but there are only three of them.

The results are from following this excellent YouTube-based tutorial :
How To Create a Beautiful Earth with Blender and Cycles - Bill Knechtel

I only completed the modelling/texturing section -- with that weird atmospheric fringing it didn't seem worth laboring through the compositing steps to enable the edge blur. Bill's results are great. While my results are not terrible, they fall quite short in terms of the overall effect. Now it just struck me that I wasn't using exactly the same maps -- maybe there are other settings that I missed or that were not mentioned in the tutorial.

The good news is that I just noticed that not long are the textures provided with the tutorial, Bill has made the entire scene available through Blend Swap.

I'll give it a spin tonight to compare it with my own version.

Wednesday, 5 February 2014

Material world


So it came time to apply textures. Hmm nodes. Super. It's going to take months to get my head around all the available node types, what each of them does, when to use it, how to use it. Last night I did the following playing around. 

First Node-based materials.

Not yet ultra-realistic, but I can see how you build up the levels/nodes.


Tonight I joined Blend Swap and downloaded a couple of the material libraries. Some of the node based materials use tens of nodes. Bonkers level of complexity. I can see the attraction though. The level of fine tuning and the nuance it allows you to add is very impressive. Creating textures is quite addictive too.

Monday, 3 February 2014

Kennedy complete-ish


The Kennedy-class 2300AD Star Ship is now in the 'finished' category. That doesn't mean I won't be tweaking it some more - it just means that it's time to move on. I put together the above presentation then closed the file down. I think I'll give it a few days to stew before going back with fresh eyes.

Next, it's back to a long brewing idea about a vast vertical shaft of concrete, filed with gantries, bridges and pipes. A perfect setting for a simple animation. I realised that I might overcome the UV pains experienced in the last stab by creating the tunnel using the following approach:

1. Create a circle, immediately drop the faces to 8, creating an octagon.
2. Extrude the octagon along 'Z' to create a tube.
3. Bevel the edges so soften those corners.
4. Delete all the faces except for one big face and one of the connected bevel faces.
5. Subdivide the remaining big face and add some structural details.
6. Once your happy with the details, create a copy of the face and then rotate it (around the original centre point) by 45 degrees. Repeat this step on each new set of faces until you have an octagon tunnel again.


The result is a highly detailed tunnel that took about 15 minutes to model. Getting the texture mapping is where I came unstuck. I have no idea what I'm doing in either the UV tools or the node editor. Much reading required, followed by much-much practice.


Thursday, 30 January 2014

Slower progress: still progress

Kennedy-class Missile Cruiser from the 2300AD Science Fiction Role Playing Game.

Progress continues. It's just harder to see now. I'm more fluent in some areas but maybe have some bad habbits. I'm not using the snap tools enough -- too much placing by eye. Bad habits I'm hoping to drive away.

I'm finding fine-detail work harder going. The old workflow of starting with some polygons and extruding is harder because I find the curve tool to be a pain to use -- it doesn't let you build non-curved polygons very easily. There is a workflow I'm aware of where you add a cube, delete all of it's vertices, then manually lay out new verts - building up shapes that way. That seems a bit clunky - I might give it a go through.

Last night my PC crashed. It then failed to reboot with some very worrying messages about not finding the boot drive. Well after some tinkering in the BIOS, it looks like the machine is forgetting which is the valid boot drive because I can get the machine back by manually selecting the correct drive. Bugger! Hopefully I'll get to the bottom of the problem quickly. BIOS quirk or Master Boot Record curruption. *sadface*

My next hurdle will be learning about texturing, UV mapping (apparently highly regarded in Blender) and the use of the Nodes for material creation.

Monday, 20 January 2014

You see UV


Very early test for an idea I've had for an animation that's been floating around my head for about 10 years. I don't yet understand the ins and outs of Blender's UV tools although the fact that I was able to not make this truly horrible with minimal knowledge and effort gives me hope for the future.

Rendered with Cycles (CUDA) in about 18 minutes.

Friday, 17 January 2014

15minute build project #2


Time that could have been spent improving my table tennis skills - instead I'm spending my lunch break doing quick-fire Blender models. It's a flyer!

Thursday, 16 January 2014

A first use in anger...


(this is a cross copy of the latest post that I made to my 2300AD game blog -- because its really all about Blender)

Blender Before
I had a play with Blender many years ago - back when Caligari was still actively developing its trueSpace 3D package. At that time I thought that Blender was an extremely worthy bag of spanners - a wonderful idea that looked and felt like it was trapped in the UI straight-jacket. This was, I must confess, a snap decision based on hours (actually probably minutes) of attempted use. Clearly I hadn't been willing to suffer the mental pains or productivity dips that result from trying to work with a new set of complex tools.


A holiday challenge
It dawned on me that I hadn't really tried to get my head around a new 3D package in well over 10 years. I wanted to remind myself what it's like, having spend many months on more technical learning challenges, like getting to grips with Hadoop and Big Data. Now usually the Christmas/New year holiday gives me the biggest allowance of the year for self indulgence - which has often resulted in days of playing computer games. So this year I decided to invest that free time in learning to use Blender. I assumed that one of three things would happen:

a. I'd give up because of some serious limitations or because it's just so horrible to use that I could see now value coming out of the effort. For the record, about 2 years ago I fell madly in love with SketchUp only to drop it like a burning rock after seeing what happened when a scene got moderately busy.

b. I'd be so impressed with Blender that I'd undergo CGI apotheosis, becoming a Blender evangelist, throwing away all my old tools and floating around the internet of a cloud of Blender love.

c. I'd get to grips with Blender, learn its strengths and weaknesses and then go back to 3DS Max 4 with a new set of tools to call upon when required.

So one month later, which is it?

Well, having a 15-month old son has resulted in a big reduction in the time I had available to invest, so I'm actually only half way through where I thought/hoped I'd be. But I'm still on the journey. Still enthusiastic. So far though, I'm somewhere between b. and c. depending on what kind of 3D output I'm looking to produce. I don't consider myself quite an evangelist -- but I'm increasingly an enthusiast and supporter.

Today, Caligari is - very sadly - a footnote in 3D modelling history while Blender has grown into a very respectable tool that has proven capable of (limited) production-quality output. When the full feature film (http://gooseberry.blender.org/) is finished you can remove that 'limited'.

 Blender still has a reputation for being unfriendly to new users, I still think this is true (to some extent), although I'd add that if you want to do 3d modelling and animation, and you want to produce work that is worthwhile - that people other than your mum will appreciate - then you have to be realistic about the time commitment required for learning the tools and techniques - not to mention to apply and practice 3D art.

Spending an hour per day for 2 weeks, (doing a combination of reading/watching and using) is what I consider a foot-in-the door for learning Blender modelling. At that point you'll know enough to Start up Blender and get working on something without constantly needing to search the documentation or every little thing.

Tuesday, 14 January 2014

Building for real...


I forgot to post the first 'real' object, by that I mean that I did a Google image search for Roman temples and used several results for reference in building this quick (2-3 hour model). It was great experience although I'm probably not going to finish/fix the model as it served its purpose well.

I've started another model, a much more ambitious 'space plane', again based on some very limited reference drawings (a set of deck plans). I'll post a progress shot tomorrow - which will encourage me to make some progress on it.

Other news:
I still get completely stuck doing simple stuff --- like creating flexible pipes. I find the bezier curve tools a bit tricky to use. I feel like there should be a set of curve creation tools that let you start with no curving, then once you have a shape knocked out you'd go back and chamfer or curve selected points. That's the Max user talking and I probably just need to go back and read the available documentation again.

I'm starting to forget the stuff I learned in the first week or two. Doing searches for basic stuff like 'how to separate stuff from a mesh' - "P" apparently. Clicking "P" appeared to cause weirdness. I need to try and recreate and investigate. Could it be a bug? *gasp*.

I don't think that Blender has ever. EVER crashed -- maybe once, and probably boolean madness was involved. Still, this application is as solid as a rock.

Sunday, 12 January 2014

CUDA speed!


15-minute Spaceship project.

I thought I'd do a comparison between CPU and CUDA powered Cycles rendering:

Final Quality (CPU i7 3770 3.50Ghz): 2:46s
Final Quality (CUDA Nvidia GTX690): 45s

Holy moley! That's a non-trivial performance lead from my graphics card's computation engine. I realise that currently there are caveats to this performance benefit --- it's only reliable for use on basic scenes. Still, it bodes well as CPU performance appears to be in a bit of a slump compared to graphics card architecture.


Friday, 10 January 2014

15 minute project (lunchtime)


Last night I finally watched a tutorial about Cycles:
Blender Journey - Introduction to Cycles

Why didn't anyone tell me that you don't use lamps with Cycles?! Honestly!  Well, I'm now even more impressed with Cycles now I'm using it semi-properly.

Sunday, 5 January 2014

Tip: Inset by individual face

1. Select the faces on which you want to place insets.
2. Here's the part that had me scratching my head -- Press Alt+E. This brings up an Extrusion menu allowing you to select "Region" or "Individual Faces"
3. Press "I".

Alt+E brings up a menu for the selection context.

Applying insets on a per-face basis: big time saver!


This saves me a lot of repeated action trying to copy insets across a number of faces in my mesh.


Saturday, 4 January 2014

Spinning and mapping

Test vases containing magic lights
Today I did some practice spins --- it seems so obvious now. The resulting vase was pleasing enough to justify doing a test render using texture maps. Right, so how do I do texture maps? Well it's pretty straight forward to get the basics.

Troubles
I didn't understand why my initial renders didn't show anything past the edge of the furthest away vase - the answer was obvious, clipping on the camera settings?

Untroubles: Yesterday's min-rant about not being able to easily apply a shaderless texture (for a background scene which would be presented with it's own light values). Well looking at the comments in the tutorial someone suggested changing the object's Ray Visibility in the Properties tab, disabling Diffuse, Glossy and Shadows. It works, it's easy.  Sorry for doubting you, Blender!

Object Properties for Ray Visibility are a quick fix for shaderless materials in Cycles -- I think


Friday, 3 January 2014

Spin one and other hair pulling lessons


Spinning too several readings of the Blender docs to understand my mistake...

History is made -- my first spun object. Blender managed to make what is the simplest modelling tool on the shelf into something uniquely hard to use --- to be fair only because like with many Blender operations it makes sure that it doesn't work quite like other packages.

1. Start with a shape (open along the spin axis)
Online tutorials suggest that you create a spline by deleting the vertices of a cube and the hijacking the cubes entity properties -- a bit of a clanger piece of functionality from the start --- maybe there is a way of laying down raw vertices but I can't find it.

2. The spin will take place from the 3D View in which you invoke the spin operation --- which is what was causing my hair pulling. I'd not extended the toolbar within the right view so I was trying to spin along the wrong axis.

3. Get the 3D cursor right onto the edge of the line by using the snap cursor to selection (Shift+S -> Cursor to Selection).

4. Spin! Then modify the spin parameters such as the number of steps and degree of spin.


Phew! Earlier this morning I discovered how to present an unshaded texture map (a background image) on a plane using the Cycles renderer. It took an 8-minute video tutorial and the rather involved use of a several nodes. Ouch! For such a simple requirement that's a rather grueling procedure.

Time is running out. I'll be back to work in a few days and Blender won't be getting much of a look in until a hefty amount of technical writing is completed.

The scene outside the window looks like it's being pumped through a filter. At least it's not shaded!

Thursday, 2 January 2014

Cycles - Pretty Good Renders

Cycles. Capable of ruddy nice renders. A bit slow though...

Samples: 60 (Final) Render time: 1 hour 6 minutes 


Samples: 12 (Draft) Render time: 14 seconds

Other news: I purchased Blender 3D Basics by Gordon C. Fisher (for all the wrong reasons - like buying a self-help guide for something you want to fix with a quick no-hard-work-required solution). By the way, at the time of writing it's being sold at a massive discount on this site -- much cheaper than the Amazon store version that I bought...

The book's good, but I've always struggled to go through lengthy tutorials that don't give me an output that I want to create. My perfect 3D blender book would be full of quick 5-step tutorials like "How to extrude a selection of faces along their normals" or "How to quickly create simple 2d shapes without lots of needless pulling and pushing".

The edge of the Christmas storm

 Christmas 2024 is officially upon us. Family members are starting to gather, and presents haven't wrapped themselves. I've figured ...