 |
| Testing the water |
 |
| Added some visual interest... |
 |
| Lighter and with a subject called Arte. Hi, Arte! |
There was not much productive work today. I did some housekeeping, so to speak. I tested some Quixel assets. They're going to be temporarily free as they move from Unreal-centric to an agnostic 3D/game asset store. They have some incredible models, but the results in Blender often look very wrong. I need to look at how the materials are being set up, I think the projection might be wrong on the normal maps.
 |
| Quixel 3D asset. Icelandic plain |
Luna version.... I've been trying this a lot.
 |
| This is another quick run at a moon landscape. Little rocks add a lot, but a lot of refinement is still required. |
I'm taking a break from failing at rigging. I could feel my confidence and enthusiasm melt whenever my attempt to build a simple rig ended messily. I've got something fundamentally wrong and baked it into my practice without realising it.
I need to start from scratch with a fresh head, make more notes, and do more troubleshooting and error searches to get to the bottom of the problem. It could also be that my rig requirements are quirky and actually more difficult than they look.
 |
| I'll return to the container vessel soon. |
 |
| Terrain! |
 |
| Base scene |
Did I tell you that I'm struggling with rigging? I'm still struggling. I realize how important it is to be in the right mode for rigging. Some of my woes are down to accidentally creating new armatures or doing edits in the wrong mode.
 |
| Simpler requirements, but it's still beyond me. |
A further set of complications has come to light: bone rotation! It is not aligned to world space, and some transformations are done incorrectly. I come out of pose mode and find my parented objects suddenly arranged randomly. The previously parented key element has its origin at some random location now. Bones need to have appropriate rotation. If they are twisted incorrectly within the rig, then your rig's movements will be wonky at best.
 |
| 4.2.2 |
This morning, I completed a couple of hours of animation training using a Udemy course. It's very good! It's easy to follow and pitched at the right level for me. Sadly, it's already run through the elements that I needed training on. The next six hours are about character rigging rather than rigid bodies. I'll complete the course, but not as a matter of urgency.
 |
| A pump-type thing with a rigged piston. |
 |
| New hinge system ready to be rigged. |
I finally threw myself into the Blender rigging. I was firing on all cylinders, raring to go, but I repeatedly bounced off the wall. This stuff is hard, or I'm really stupid. Wait! I know I'm stupid, but both cases could be simultaneously true. You can see why this is making me glum.
The problem: Rigging uses several interconnected systems, all entirely new for me. This is animation, of which I know almost nothing. This type of animation uses an armature system, like an old-fashioned puppet's wood-pins-and-string skeleton. I don't know anything about armatures. Except, they're made out of bones. Bones define where movement happens, what constraints are placed on the movement, and what effect movement has on the overlayed mesh. Bones seem hard. There are many hidden rules about how all these systems relate and interact.
Like so many problems, this one started with YouTube—lots of YouTube! I've watched about six videos on rigging rigid-body systems, like pistons and hinges, but it hasn't sunk in.
So what next? Training—proper Training! It just so happens there's a good Udemy Blender animation course on sale. So, I enrolled and will gradually work through 8 hours of knowledge.
This has been dispiriting, but it reminds me of the first few hours of using Blender. Crushing ignorance weighs you down, but if you are patient, you slowly make your way up the wall. Tomorrow, I will climb that wall!
Why do I need this knowledge? It's that hinge system! I rebuilt it so that it straddles the support rings instead of working only off one ring. Well, it made sense at the time, although I'm still not sure that if I rig this system up, it will actually work as expected.
 |
| Bloom transparencies in the viewport and the output result |
 |
| Flare! |
 |
| Ring of flare! |
I got the support ship completed sufficiently. It only needs to be docked with the Bayern for a poster image.
I'd polish a bit more if I intended to animate, but this is enough for now.
 |
| ISV-5 Anton Dohrn |
 |
| Anton Docked with Bayern. |
I had some right pain with this. I'd lost my fuel ball rebuild, so I had to do it again. I have floating model parts that disconnect from their actual location. This is sometimes caused by a displacement that moves the mesh during rendering, but I couldn't see where it was applied or why.
Something different.
I bought a new product, Character Creator 4. It creates 3D characters for animation. I want better characters in my scene, and this seems like a good start. Although the range of available characters is large, they are super-expensive, so I might end up sticking with the default characters.
Susan!
This is a good start! Installed Character Creator 4. Installed an auto-setup plugin and a Blender workflow plugin. Loaded one of the default characters into CC4. Clicked on the Load into Blender button -- Boom! Blender opens and the character is loaded in, all ready to render.
 |
| Susan watches the True-Sky sun |
 |
| Pretty good quality |
 |
| I need more clothes. |
 |
| Shiny! Also enormously expensive in terms of poly count |
Yesterday's efforts included rough material selection. There are still no decals, though. I did some more clean-up and rebuilt the fuel bladder.
I created a test animation during my lunch break. Then, another longer animation was rendered last night.
 |
| Animation frame. |
I made some good progress. Some changes here and there.
I now need to focus on getting the build finished. There will need to be some additional touches. I will rebuild the fuel bladder and add communication equipment and external stores. Suddenly, the container's panels look sparse, but I prefer them that way for now.
 |
| Space lighting |
 |
| Clutter-bug: Folded down for spin |
 |
| Folded-out for acceleration-as-gravity |
It's Tuesday morning. Rather than pushing on with the build, I needed to jump ahead to test that the fully populated container frame doesn't look too cluttered.
 |
| Spin ring reversed |
 |
| I like it! |
 |
| Folded down for spinning. |
The mini-project continues. I'm reasonably happy with the progress. The idea that this would be a super-quality build has fallen aside. I'm having a horrendous time with Fluent. It may be a bug, a scene corruption, or my keyboard or mouse has been sticking. I managed to get what I needed, though.
 |
| Understated Pod |
 |
| Longer and with a bigger cage |
It's time to build another space vehicle, this time one of my own designs. I'm also looking to make it available for sale, which is forcing me to be more careful in the build process. Every time I try to ignore some lousy meshwork, I see some future customers looking at duplicated verts or shader artefacts and then raising complaints.
This extra level of care might be eroded over time. We will see.
The idea:
 |
| The concept |
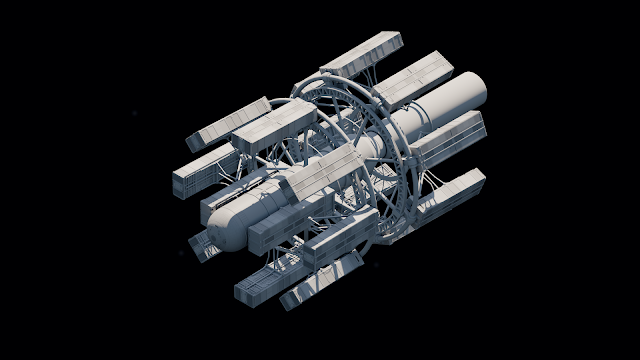
Containers that pivot on their support ring
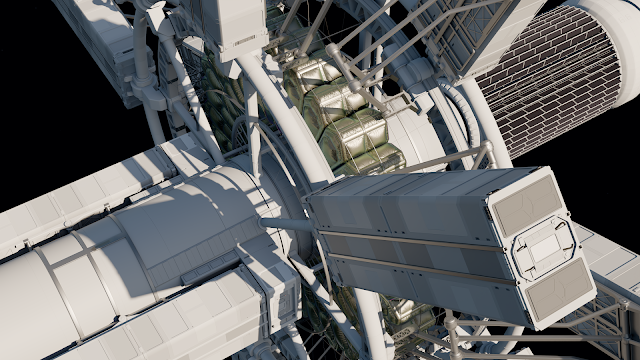
This heavy rig travels at 1g to its destination. During the journey, it accelerates forward, creating simulated gravity. The container units pivot on their support ring so that their decks are oriented appropriately. Once at the destination, the engines turn off, and the vehicle sits in an orbit. The containers then pivot ninety degrees so that gravity can be simulated by spinning the rig on its forward-rear axis. This model was built in July 2023. I liked the concept but not the execution of some elements. Particularly those Space 1999 Eagle-like Drone module trucks. So it's time for some new and improved!
 |
| Happy enough with this as a starting point. |
 |
| Checking out what it looks like with more containers. I might fit another six on the ring... |
I lapsed on my HardOps training course. It got unstable and when Blender crashes a lot I have to go and do something else or I completely lose my enthusiasm for the tool.
There is another option. A mini-HardOps from developers cgthroughts called Fluent/Fluent Power Tools, if you get a library of extra functions. It's brilliant, but like with HardOps, you need a minimal command of hard surface modelling best practices, or you get "acute bevels", where meshes get artefacts and become corrupted.
It's a tool that you can start using right away, and produce some really powerful effects in a few clicks, but you need to delve a little deeper to get the full power of the tool. I could never work out how to duplicate boolean cutters, but it turns out that they were not implemented effectively, until recently. CG Seb, explains here:
So, this post is a quick refresher and update on my fluent knowledge.
 |
 |
| Duplicated Boolean Cutter! Amaze! Amaze! |
1. Duplicate associated artefacts such as cloth meshes or slices by Parenting them to the Boolean cutter before duplicating them.
2. Duplicated booleans can be sent updates from the originating cutter by using the Boolean Synchronisation tool:
Having rested on my laurels for several days, it's time to report in.
The animation was incredibly well received by the 2300AD community. It has inspired me to do more in that brilliant universe. But right now, I want to get some Orbital Elements stuff done. To that end, the first effort will be a brief animation of a Luna facility. It combines space and terrains: Love Squared!
 |
| Less ledges, more crater |
 |
| Lovely ledges |
 |
| Testing out for scale |
If I use this terrain, I need to decide on the size of the facility and how big the terrain will be. This looks about right. However, it does mean that the terrain is too small to establish the surroundings. It might be a bit tight. The animation could be a camera crane's upward motion. Something simple.
I officially have a mild case of the dreaded lurgi. My throat burns with a mysterious fire, and my head is full of cotton wool. I feel like...
